Managing Your ASPHost.net Database with Microsoft SQL Server Management Studio (SSMS)
In the previous section, we have successfully installed the Microsoft SQL Server Management Studio. In this section we will go through the steps of connecting to your ASPHost.net database from SSMS, using your Username and Password.
1
First things first: Login to your account dashboard. If you don’t know how to do so, please referrer to the detailed instructions in the Getting Started Guide.
2
Once logged in, click on the “Manage Databases” link on the left sidebar of your dashboard. Your databases should display on the screen (if the list is empty, then you need to create a database. Please refer to the Getting Started guide for detailed instructions).
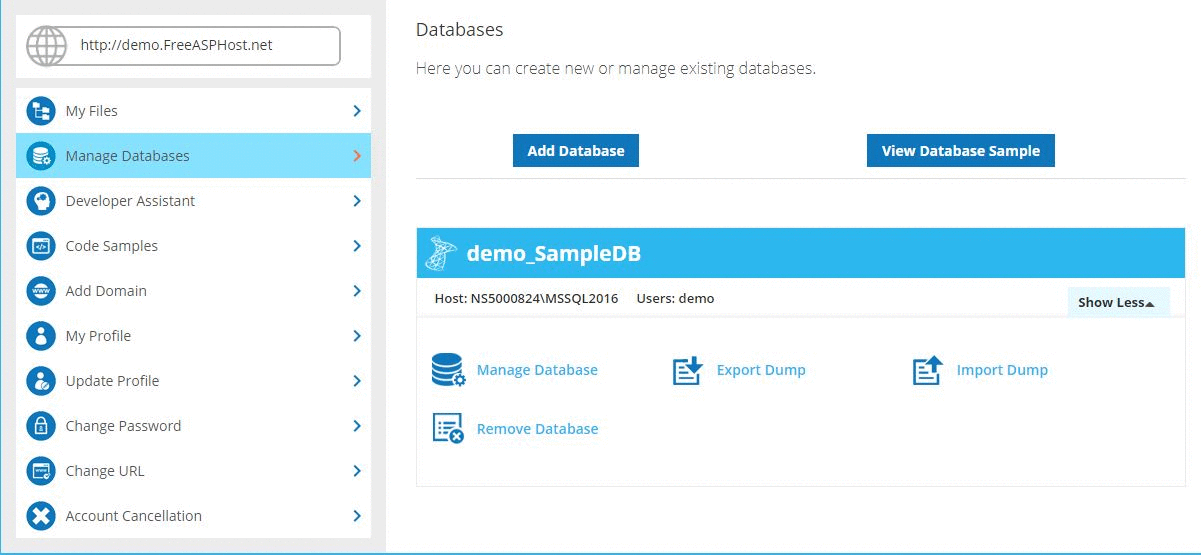
You may now proceed to the next step and click the “My Files” link on the left sidebar.
3
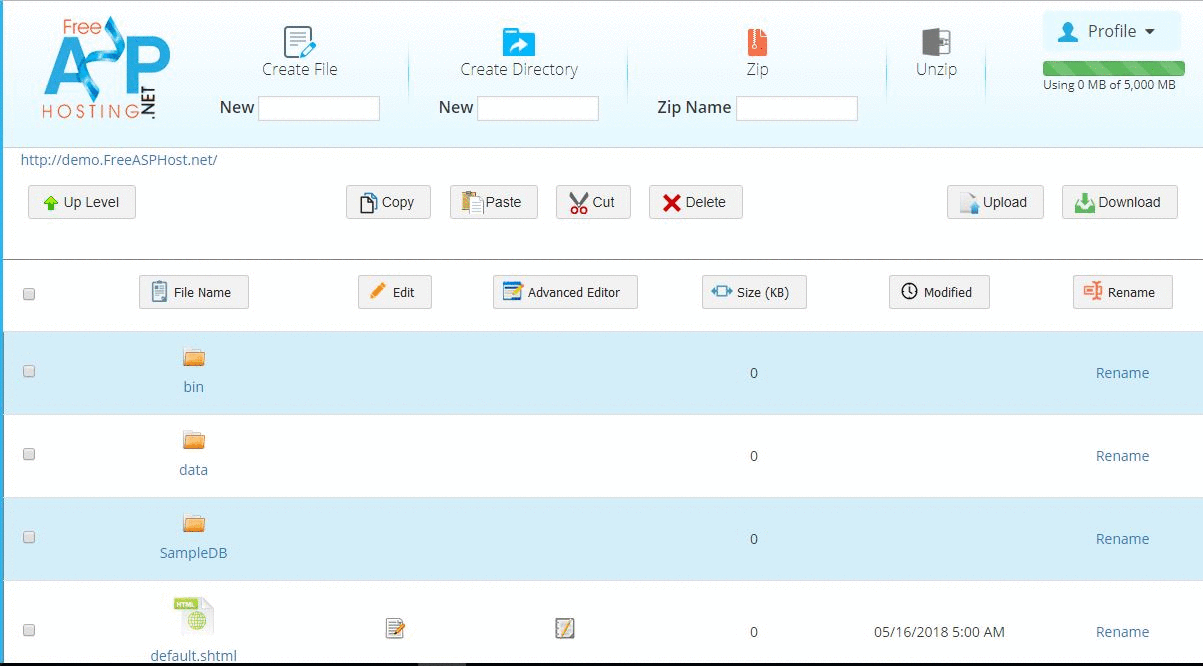
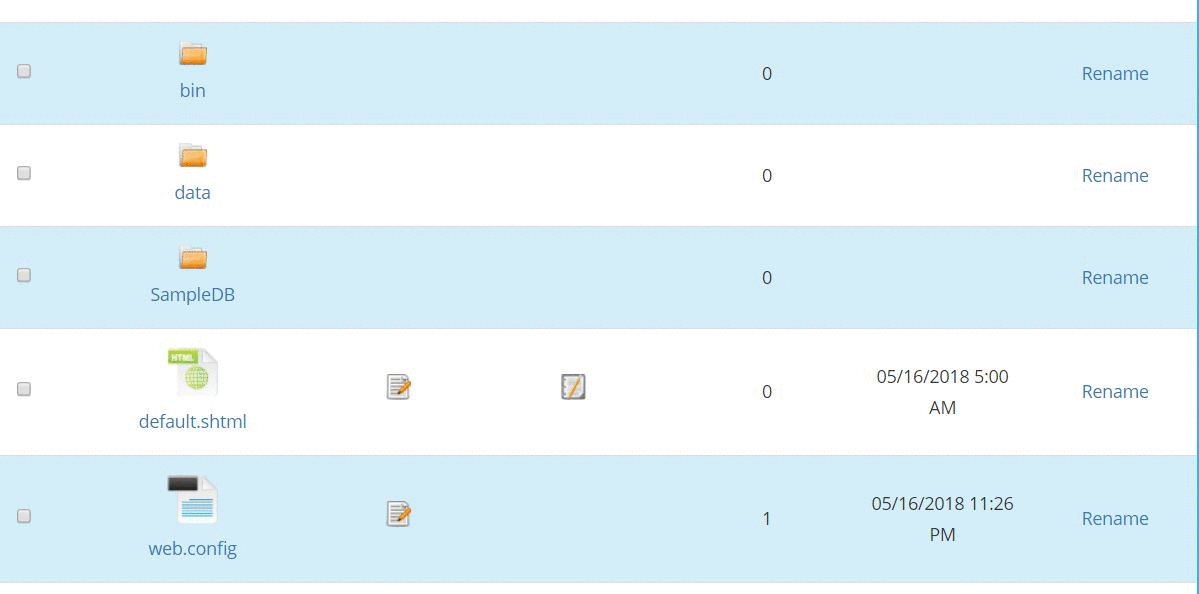
Now you should be on the file browser module, which allows you to upload, download and manage your files on the server. By default, the files manager displays the list of files and folders on your account.
4
Scroll down the list of files. We are looking for the file called “web.config”. Once you find it, click the edit icon  that should be displayed on its right.
5
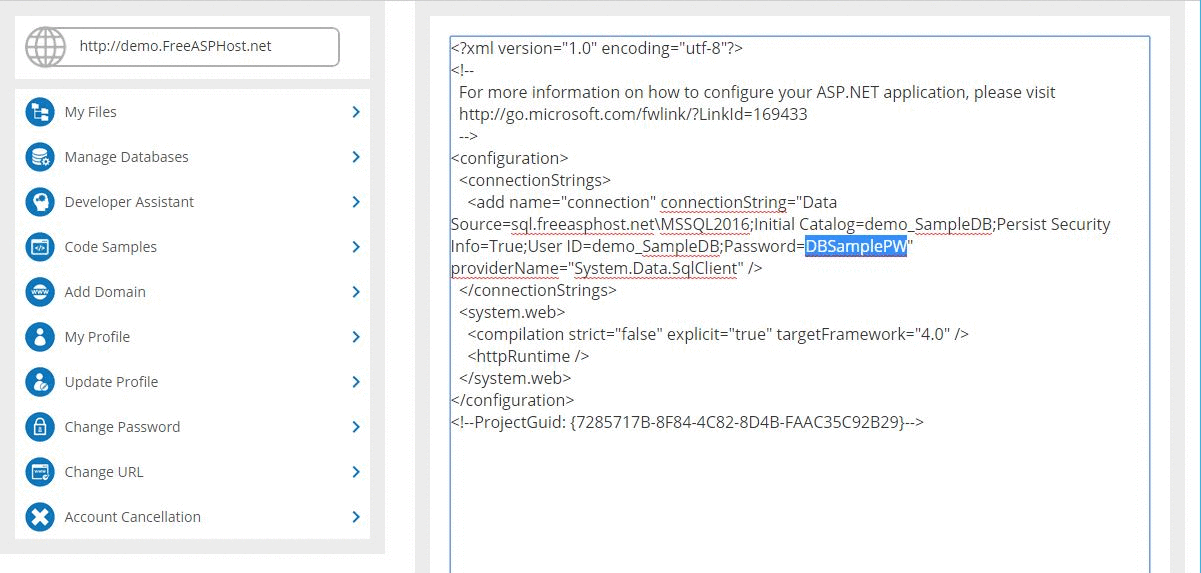
The edit icons opens up the “web.config” file in the online file editor. The “web.config” files is nothing but a simple xml file. We will use this file to retrieve authentication credentials (Username and Password) of our demo / sample database.
As you can see in the following screen, the Username in this case is: demo_SampleDB, and the Password is: DBSamplePW.
6
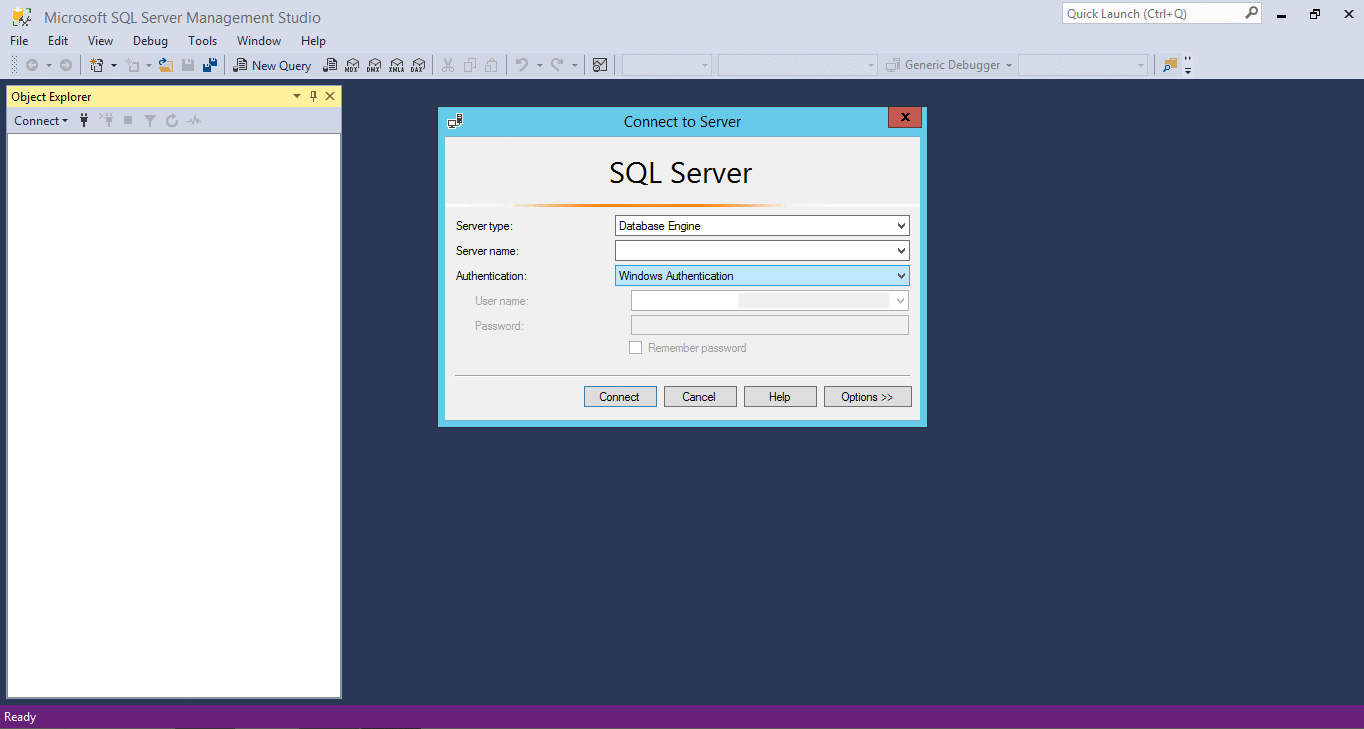
Now head back to Microsoft SQL Server Management Studio (refer to the previous section for detailed steps of how to install and launch SSMS).
7
You need three pieces of information in order to log into a database server: The server name, the username and the password. Use the following as Server name: sql.freeasphost.net\MSSQL2016
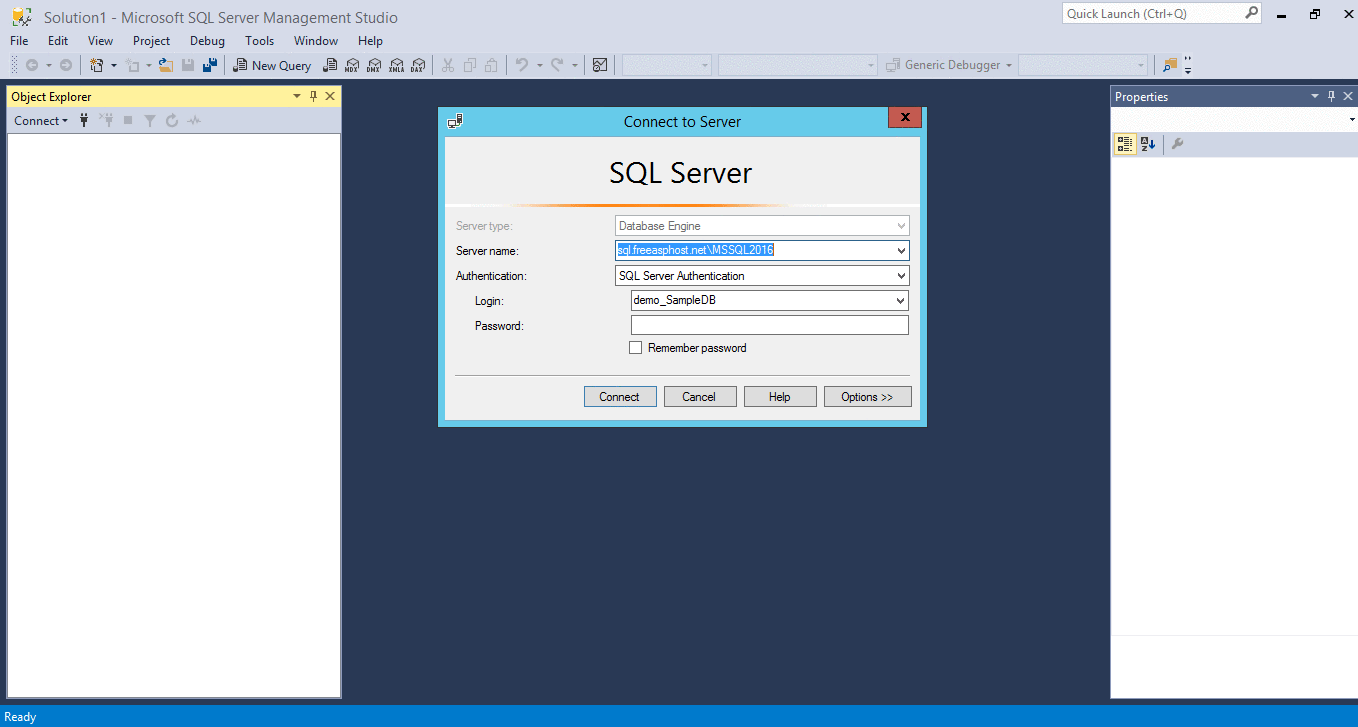
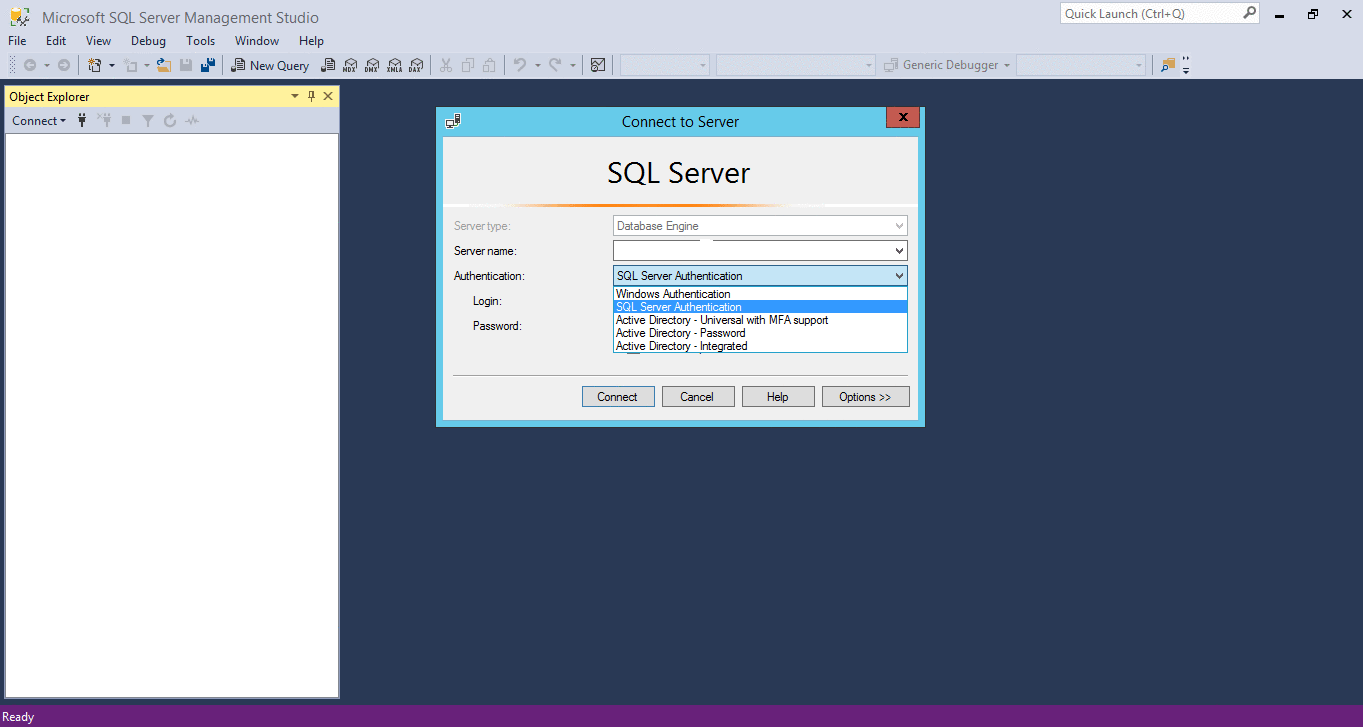
Next, select “SQL Server Authentication” for the Authentication field.
Now, you can use your database credentials (Username & Password) from Step 5, and press “enter” or click “Connect”

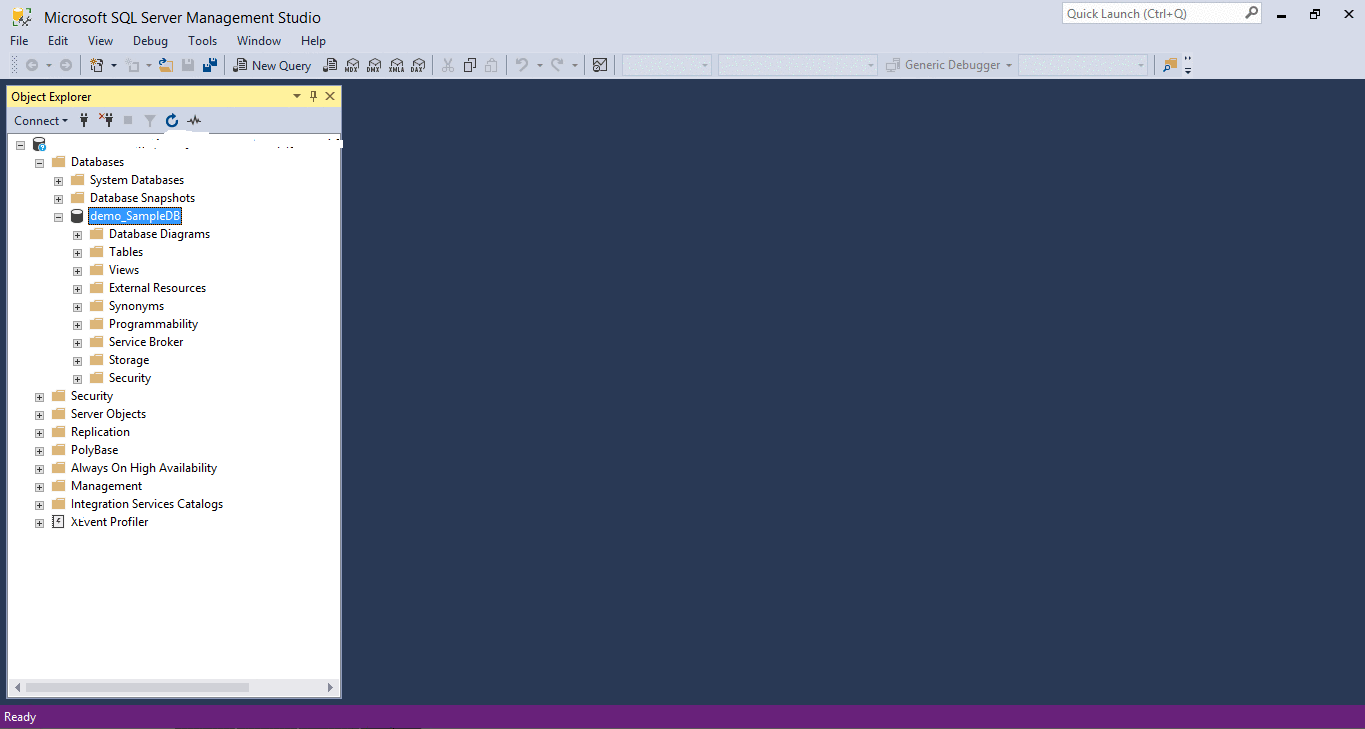
8
If everything goes well, you should now be logged in. The sidebar of SSMS displays folders and objects from the database server. If you open the “Databases” folder (by clicking on the small + “plus” sign), you will see the list of databases, and hopefully our “demo_SampleDB” schema.
You may open it (by clicking on the small + “plus” sign), and it should display the content of our demo schema (Tables, Views, etc).
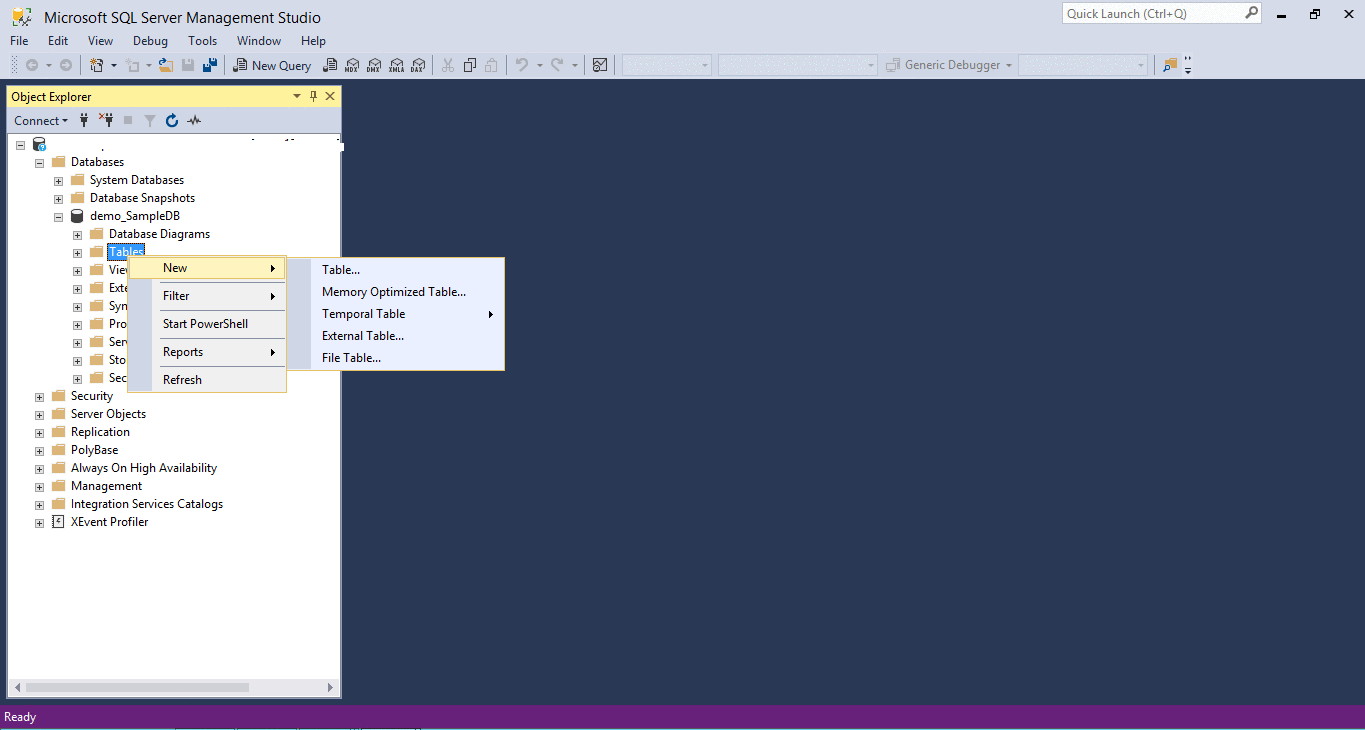
9
In order to create an object, let’s say a “Table” in our “demo_SampleDB” schema, simply right click on the “Tables” folder, select new and then select “Table.”For more information about DBMS (Database Management Systems) and SQL (Structured Query Language), please refer to our online tutorials available here.